Recent Comments widget is a popular widget most commonly used in blogger blogs. In this gadget we have the avatar of the commentator, his/her name and what he commented on the post previously.This widget shows the newer comments on the top and older one in the bottom so this is very good for being a part of the post or blog.I have already shared my post on recent comments widget in Blogger So, I am going to show you How To Add Recent Comments Widget With Avatars in Blogger.


Step By Step:
Adding Recent Comments Widget With Avatars in Blogger:
Step 1: Go to Blogger.com
Step 2: Go to Dashboard > Layout.

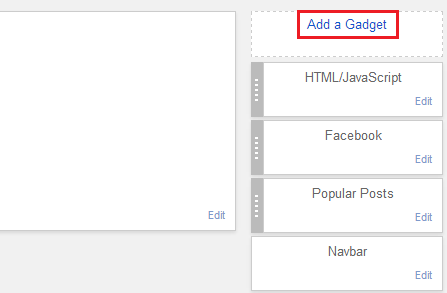
Step 3: Now click on ' Add a Gadget ' link .

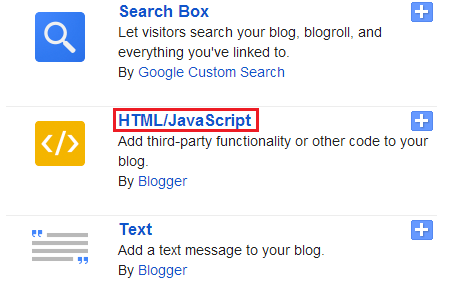
Step 4: When you will click on 'Add a Gadget ' link a new popup window will appear scroll down towards the bottom and select HTML/Javascript.

Step 5: Now a new window will appear with an empty box comp and paste the below code in that empty box.
Get this Recent Comments Widget
Step 6: Widget Setup
- For changing the number of comments change the 5 to your desired value.
- For changing default avatar image replace the URL in Blue with your desired image URL
- For changing the size of avatar replace the 60 value with your desired size.
Step 7: Now click on Save and you are done !
Recent comments widget can add more breaths to the life of your blog so please try this.
Recent Comments widget is a popular widget most commonly used in blogger blogs. In this gadget we have the avatar of the commentator, his/her name and what he commented on the post previously.This widget shows the newer comments on the top and older one in the bottom so this is very good for being a part of the post or blog.I have already shared my post on recent comments widget in Blogger So, I am going to show you How To Add Recent Comments Widget With Avatars in Blogger.


Step By Step:
Adding Recent Comments Widget With Avatars in Blogger:
Step 1: Go to Blogger.com
Step 2: Go to Dashboard > Layout.

Step 3: Now click on ' Add a Gadget ' link .

Step 4: When you will click on 'Add a Gadget ' link a new popup window will appear scroll down towards the bottom and select HTML/Javascript.

Step 5: Now a new window will appear with an empty box comp and paste the below code in that empty box.
Get this Recent Comments Widget
Step 6: Widget Setup
- For changing the number of comments change the 5 to your desired value.
- For changing default avatar image replace the URL in Blue with your desired image URL
- For changing the size of avatar replace the 60 value with your desired size.
Step 7: Now click on Save and you are done !
Recent comments widget can add more breaths to the life of your blog so please try this.

No Comment